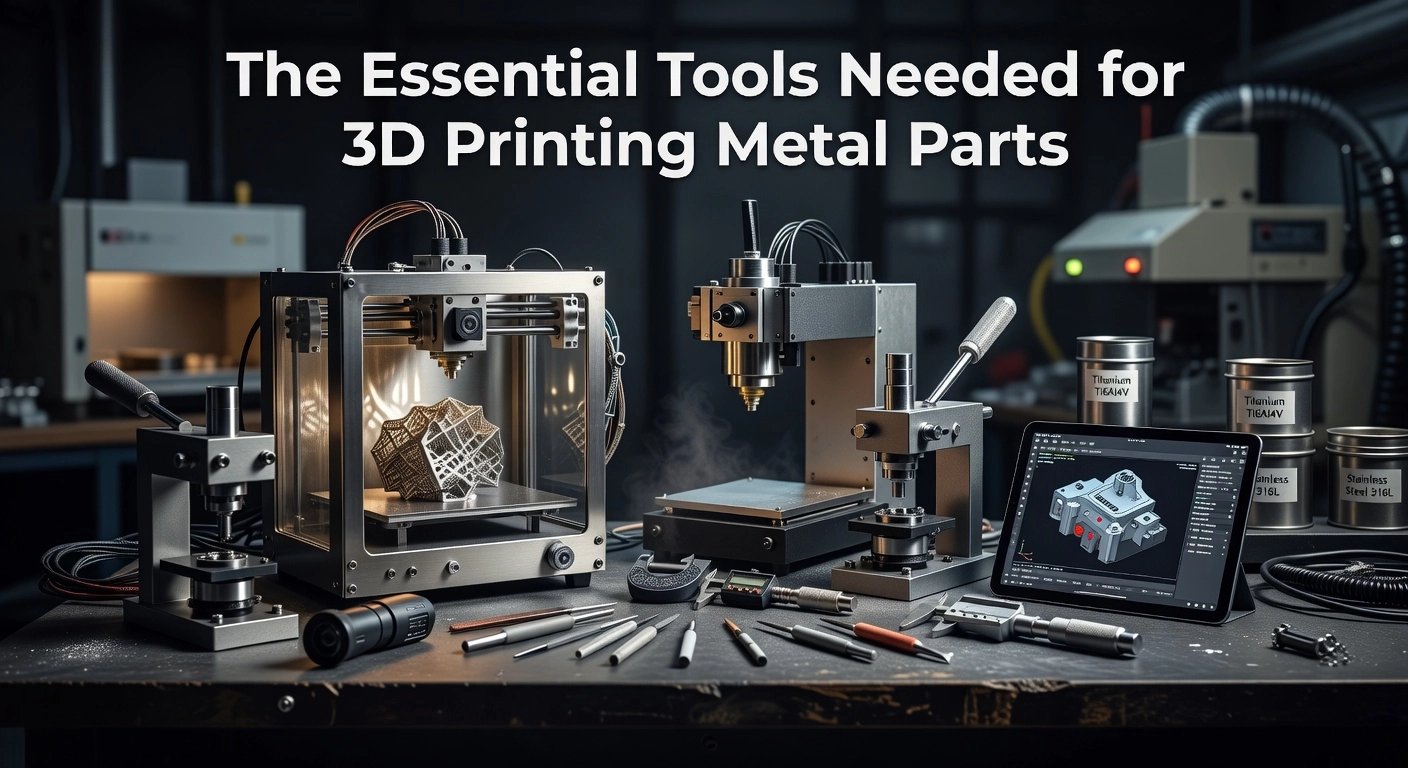
Imagine turning weeks of tedious prototyping into a matter of days. Traditional methods often involve costly tooling, long lead times, and material limitations that stifle innovation. For intermediate makers and engineers ready to elevate their game, 3D printing prototypes in metal changes everything. This technology delivers durable, functional parts with the precision and strength needed for real-world testing, all without the barriers of conventional manufacturing.
In this authoritative tutorial, you will master the essentials of 3D printing prototypes using metal alloys like stainless steel, titanium, and aluminum. We cover design optimization for metal processes such as Direct Metal Laser Sintering (DMLS) and Binder Jetting. You will learn to select the right materials, prepare CAD models for print success, navigate service provider workflows, and apply post-processing techniques for flawless finishes. Expect step-by-step guidance, proven troubleshooting tips, and cost-saving strategies that ensure your prototypes perform under pressure.
By the end, you will confidently integrate metal 3D printing prototypes into your workflow, accelerating iterations and bringing superior designs to life faster than ever. Dive in and revolutionize your prototyping today.
3D Printing Prototypes: Trends and Stats in 2026
In 2026, 3D printing prototypes continue to dominate as a pivotal technology for rapid development, offering unmatched speed, precision, and cost savings for intermediate users in manufacturing and design. This additive manufacturing approach allows for intricate geometries and functional testing that traditional methods struggle to match, making it essential for iterating designs quickly. Market analysts project explosive growth, driven by advancements in materials and software that extend prototyping into low-volume production. For teams already familiar with FDM printers, integrating metal-infused filaments like Filamet™ from The Virtual Foundry unlocks pure metal prototypes without multimillion-dollar equipment, aligning perfectly with these trends.
Market Size and Growth Projections
According to Mordor Intelligence, the global 3D printing for prototyping market reaches $13.47 billion in 2026, expanding from $11.67 billion the prior year. This segment alone grows at a 15.44% CAGR, hitting $27.62 billion by 2031. Factors fueling this include AI-optimized designs that reduce iterations and sustainable materials cutting environmental impact. North America holds over 35% share due to robust R&D investments, while Asia-Pacific surges fastest at 17.32% CAGR from manufacturing incentives. For intermediate practitioners, this means accessible tools like Filamet™ enable in-house metal prototypes at fractions of outsourcing costs, supporting sectors from jewelry to aerospace.
Adoption and Efficiency Statistics
A 2023 Jabil survey reveals 96% of companies use 3D printing for prototypes, with 67% extending it to production parts, up significantly from prior years. This near-universal adoption stems from tangible benefits: industry surveys show 70% of organizations shorten design loops by enabling same-day revisions and real-time testing. Lead times drop 50-80%, as noted in GlobeNewswire reports; for instance, product launches compress from 18 months to six. Compared to machining, 3D printing slashes 90% material waste per Grand View Research, adding only where needed for complex parts. In practice, print a Filamet™ prototype, debind in a kiln, sinter to 98% density, then tumble for finish; this in-house workflow saves thousands per iteration versus CNC shops.
Shift from Prototyping to Production
Per DesignNews 2026 forecasts, 3D printing evolves from prototyping tool to production staple, especially in aerospace and defense where certified metal parts demand resilience. These sectors accelerate adoption for flight-ready components and fixtures, with market growth tied to supply chain agility amid global tensions. DesignNews analysis highlights AM’s role in high-mix, low-volume runs, blurring prototype-production lines. For users, this shift means investing in engineering filaments now yields scalable output later, fostering innovation in nuclear or artistic applications through community-shared techniques.
How The Virtual Foundry Succeeded Where Giants Failed
The Virtual Foundry has revolutionized 3D printing prototypes by leveraging Filamet™, a metal-loaded filament that works seamlessly with standard FDM printers. This approach delivers pure metal parts through a straightforward process: print the green part, debind in a kiln, and sinter to achieve up to 98% density. Unlike complex proprietary systems burdened by high costs and steep learning curves, Filamet™ empowers users with open-architecture compatibility on printers like Prusa or Bambu Lab, requiring only affordable off-the-shelf kilns for post-processing. This accessibility has enabled rapid prototyping for intermediate users, from hobbyists crafting jewelry to engineers testing aerospace components. For instance, a basic setup starts at $3,000 for the printer and scales to under $20,000 fully equipped, including materials and software, slashing barriers that once demanded multimillion-dollar investments.
Democratizing Metal Prototyping for All Users
TVF’s model truly democratizes metal 3D printing, bridging hobbyists, artists, designers, and manufacturers. Entry-level kits under $10,000 allow immediate production of functional prototypes, fostering in-house iteration without outsourcing delays. According to industry surveys, this aligns with 96% of companies using 3D printing for prototypes and 67% for production parts (Jabil 2023). Users report 50-80% reductions in lead times, such as compressing an 18-month product launch to six months, and up to 90% less material waste compared to traditional machining (Grand View Research). Actionable tip: Start with TVF’s starter packages for stainless 316L Filamet™, printing at 0.1-0.2mm layers for precise geometries.
Community-Driven Innovation Across Materials
A cornerstone of TVF’s success lies in its vibrant community, where shared sintering profiles (e.g., 1,300°C for 2 hours on copper) turn users into experts. This open ecosystem spans metals like Inconel and titanium, plus glass and ceramics such as Boron Carbide, supporting applications from art to nuclear shielding. Published guides on sintering best practices drive innovation, with real-world examples including NASA’s custom materials developed in weeks. Finishing techniques like tumbling yield Ra 8-12μm surfaces, with mechanical properties rivaling cast parts: 530-550 MPa tensile strength.
Post-sintering, parts achieve 92-99% density and up to 70% cost savings for small batches versus casting (Additive Manufacturing Research). In nuclear sectors, tungsten collimators reduce radiation exposure; aerospace manifolds cut pressure drop by 31% and waste by 80%. TVF’s focus on FDM avoids scalability issues, ensuring sustainable growth amid 2026 trends like hybrid manufacturing and $27.62B prototyping market (Mordor Intelligence). This positions Filamet™ as the go-to for resilient, low-volume prototyping.
Filamet Technology for High-Density Metal Prototypes
Filamet™ represents a breakthrough in 3D printing prototypes, consisting of 88-90% metal powder by volume embedded in a biodegradable thermoplastic binder, primarily polylactic acid (PLA)-based. This composition ensures the binder burns off cleanly during processing, leaving nearly pure metal without chemical residues. Users can print with Filamet on standard FDM printers like Prusa or Creality models, requiring only a hardened steel nozzle of 0.6-0.8mm to manage its abrasiveness, direct-drive extruders, and settings such as 200-240°C hotend temperature, 0.2-0.3mm layer heights, and 90-100% infill for robust green parts. This accessibility lowers barriers for intermediate makers, enabling high-metal loading that traditional plastic filaments cannot match. For best results, scale designs up by 15-20% in slicers to account for sintering shrinkage. Detailed guides from The Virtual Foundry provide optimized profiles for alloys like stainless steel 316L, copper, and Inconel 718.
The print-debind-sinter workflow transforms these green parts into functional prototypes. First, print sturdy “green” parts via FDM. Next, debind in a vented kiln with controlled low-temperature ramps to remove the binder, creating fragile “brown” parts. Finally, sinter at 1050-1350°C for 1-4 hours in an inert atmosphere like argon, achieving up to 98-99% theoretical density through particle fusion. Resulting parts exhibit near-wrought properties, including tensile strength, hardness, and conductivity, suitable for rigorous functional testing such as press-fits or thermal cycling. Post-sinter finishing via tumbling or polishing yields tolerances of ±0.3mm, ideal for prototypes in demanding applications.
Filamet aligns seamlessly with 2026 FDM trends, including sustainable materials and advanced engineering filaments. Its biodegradable binder supports ESG goals amid 25% annual growth in bio-based composites, mirroring shifts toward carbon-neutral processes as highlighted in Flashforge’s FDM advancements. High-speed printing (up to 1000mm/s) and AI-optimized slicing complement Filamet’s role in multi-material workflows for resilient, low-volume production.
This technology excels in complex geometries like lattices, internal channels, and filigree, impossible with subtractive methods, enabling rapid iteration in jewelry (bespoke rings with cavities), art (organic sculptures), and manufacturing (heat exchangers). Full cycles from CAD to sintered part take 48-96 hours, shortening design loops by 70% per industry surveys.
Efficiency gains include 90% waste reduction versus machining through near-net-shape builds and 50-80% lead time compression, dropping product launches from 18 months to 6. In-house prototyping cuts costs by 52% per part, empowering sectors like aerospace with desktop metal solutions.
Prerequisites and Setup for Metal Prototyping
Enclosed FDM Printer and Filamet™ Filament
To excel in 3D printing prototypes with metal, start with an enclosed FDM printer for optimal temperature control, which minimizes warping from Filamet™’s high metal loading of 88% or more. Select models compatible with hardened steel nozzles sized 0.6-1.2mm to withstand abrasion; 0.6-0.8mm suits detailed prototypes, while larger diameters speed up bulk prints. Direct-drive extruders with dual gears handle the filament’s density effectively. Print Filamet™ at nozzle temperatures of 200-230°C, bed at 40-65°C, layer heights of 0.2-0.3mm, 100% infill, 110-135% flow rate, and speeds of 30-80mm/s. Use a brim of 10-20 lines, gyroid infill, and keep overhangs under 45° for reliable green parts. Examples include printers like Bambu Lab series or Creality Ender models, which support these parameters for rapid iteration in sectors like aerospace and jewelry. For best results, store filament dry and use a Filawarmer to improve feed reliability.
Kiln, Furnace, Safety Gear, CAD, and Finishing Tools
A programmable kiln or furnace reaching 1400°C is essential for debinding (200-600°C) and sintering (e.g., 885°C for bronze, 1350°C for steels), using refractory crucibles and ballast like alumina for support. Safety demands heat-resistant gloves, tongs, safety glasses, respirators for fumes, ventilation hoods, and a Class ABC fire extinguisher; always operate in a clear, unattended-free zone. In CAD software such as Fusion 360 or PrusaSlicer, apply 20-25% linear shrinkage compensation (e.g., scale by 1.25 for most Filamets, higher in Z-axis), thickening walls and adding sintering supports for precise post-process dimensions. Finishing requires The Virtual Foundry’s stainless steel tumbling media in a rotary tumbler with water and Tumbling Liquid for 30-60 minutes, followed by wire brushes or rotary polishers; digital calipers measure green, brown, and sintered parts to verify 95%+ density via Archimedes method.
Join the TVF Community
Access shared sintering profiles and troubleshooting by joining The Virtual Foundry community. This support accelerates 3D printing prototypes, cutting lead times by 50-80% versus traditional methods. Check detailed sintering guides for alloy-specific ramps. Total setups stay under $10K, empowering in-house metal prototyping.
Step 1: Optimize Design for Sintering Shrinkage
Design with Oversize Scaling in CAD
When creating 3D printing prototypes using Filamet™, the first critical step involves compensating for sintering shrinkage in your CAD model. Filamet™ filaments, loaded with 88% or more metal powder, undergo 10-25% linear shrinkage during sintering, depending on the alloy and process conditions. To achieve precise final dimensions, scale your design upward by 20-25% uniformly or anisotropically. For instance, apply a 1.25x scale factor in software like Fusion 360 for alloys expecting 20% shrinkage, using the formula scale_factor = 1 / (1 – shrinkage_fraction). TVF provides alloy-specific data: Copper shrinks 12-18%, Stainless Steel 316L 14-20%, and Bronze 10-16%. Print and sinter test coupons, such as 60mm cubes, to measure actual shrinkage iteratively and refine your scaling for optimal accuracy. This approach ensures parts like aerospace brackets or jewelry molds retain intended geometries post-processing.
Supports for Overhangs and Bridging Minimization
Filamet™’s high density (4-12 g/cm³) makes it prone to sagging, so incorporate supports strategically for overhangs exceeding 45°, limiting them to 55° maximum. Use tree or lightweight supports that sinter away cleanly or are easily removed, positioning them to counter potential warping from uneven shrinkage. Minimize bridging spans to under 10mm, especially in the Z-direction where gravity pulls heavily. For complex prototypes, favor generative designs with thinner structures over solid blocks to promote uniform densification. These tactics prevent print failures and maintain structural integrity during the green state handling.
Wall Thickness and Feature Guidelines
Target post-sinter wall thicknesses greater than 1.5-1.8mm for strength and ductility; pre-sinter, design for 1.8-2.25mm assuming 20% shrinkage. Use 3-4 perimeters with a 0.4mm nozzle for robust shells, incorporating gyroid or triangle infill at 15-35% density to equalize shrinkage forces and facilitate binder escape. Avoid thin features like pins under 1.8mm diameter post-shrink, embossed details below 0.25mm, or holes smaller than 1mm pre-sinter, as they risk closing or distorting. See TVF’s design guidelines PDF and shells/infill recommendations for detailed parameters.
Simulation and Validation
Simulate contraction empirically with TVF sintering profiles in tools like Ansys, or print test geometries to derive custom factors. Validate by producing a low-resolution plastic proxy in PLA using identical slicer settings to check fit, tolerances, and assembly before committing Filamet™. This low-cost iteration accelerates prototyping, aligning with trends where 70% of organizations shorten design loops via such methods. With metal 3D printing markets growing at 25% CAGR to $3.62B by 2030, precise optimization unlocks reliable, high-density parts for demanding applications.
Step 2: Print Your Prototype with Filamet
With your CAD model optimized for sintering shrinkage from Step 1, proceed to printing the green prototype using Filamet™ filament. This stage transforms your digital design into a robust, metal-dense part ready for debinding and sintering, leveraging standard FDM printers for cost-effective 3D printing prototypes. The Virtual Foundry’s Filamet™, packed with 88-90% metal powder in a biodegradable binder, demands precise settings to achieve high green strength and minimize defects.
Hardware and Filament Preparation
Equip your enclosed FDM printer with a hardened steel nozzle sized 0.6-1.0 mm to handle the abrasive filament; a 0.6 mm nozzle is ideal for detail while reducing clog risks. Opt for a direct drive extruder for reliable feeding of the dense material, though adjusted geared extruders suffice. Dry the filament at 80°C for at least 4 hours in a dedicated dryer, as Filamet™ absorbs less moisture than standard plastics but benefits from this prep to avoid brittleness. Snip a clean, angled tip on the filament end, load it via a straight path, and purge to clear debris. An enclosed chamber is non-negotiable to maintain thermal stability, prevent warping, and ensure layer adhesion during slow prints.
Key Print Settings and Process
In slicers like Ultimaker Cura, load a TVF-optimized profile for seamless setup. Set bed temperature to 190-220°C for superior first-layer adhesion, nozzle at 205-215°C, print speeds to 10-20 mm/s, 100% infill for structural integrity, and layer height of 0.3-0.4 mm to balance detail and strength. Use 120-135% flow rate, minimal cooling (0-20%), 3-5 perimeters, and a 10-20 line brim. Scale your model 14-20% oversized per TVF alloy datasheets to account for shrinkage. Monitor the first 10 layers closely: listen for clicking (indicating clogs), inspect bead shape, and adjust Z-offset in 0.02 mm increments or flow by 2-5%. Clean clogs promptly with the included unclog tool, cold pulls, or nozzle swaps; hardened nozzles endure 10x longer than brass.
Aerospace Bracket Example
Consider an aerospace supplier prototyping a 316L stainless steel bracket: sliced in Cura using a TVF profile with dense infill, supports for overhangs, and lattice optimization. Printed at 10 mm/s on an enclosed printer (0.6 mm nozzle, 100% infill), it slashed lead times from 8 weeks to 5 days, cut scrap by 60%, and enabled 20-60% weight savings post-sintering. For detailed guidance, see the FFF Metal 3D Printing Guide. This approach aligns with 2026 trends, where FFF metal printing accelerates iteration by 5-7x, reducing prototyping costs up to 70%.
Next, prepare for debinding to unlock pure metal density.
Step 3: Debind to Remove Binder Material
Following the printing of your green prototype with Filamet™ filament, the debinding step removes the biodegradable binder, transforming the fragile green part into a porous brown part ready for sintering. This critical process prevents defects like cracking or blistering during later high-temperature stages by ensuring controlled binder burnout. Place the green part in a kiln, supported by refractory powder such as alumina for stability, with ample clearance (15-40mm) around it to allow uniform heating and gas escape. Ramp the temperature gradually to 600-900°C over 4-8 hours, tailored to the alloy; for instance, bronze Filamet™ requires a 55°C/hr ramp to 482°C with a 4-hour hold, while tool steel H13 demands conservative profiles up to 538°C over 12+ hours. These alloy-specific ramps, detailed in The Virtual Foundry’s debind-sinter guide, minimize stress gradients and ensure complete volatilization.
Opt for thermal debinding, the most accessible for intermediate prototypers, or catalytic methods for faster results; thermal uses air or inert atmospheres to evaporate binders, while catalytic employs acid gases at lower temperatures (100-150°C). Monitor weight loss meticulously, targeting 12-15% reduction from the green part’s mass to confirm binder removal; weigh before and after, and extend holds if loss stabilizes prematurely to avoid sintering voids. Proper ventilation is essential, as fumes include toxic CO and hydrocarbons; use exhaust hoods, inert gas purges like argon, and PPE such as respirators. The Virtual Foundry provides precise profiles in their free guides, incorporating kiln tips and simulations for optimal results.
Post-debind, inspect the brown part visually and microscopically for cracks, blisters, or residue; handle with tongs due to its fragility, which retains 80-90% of green dimensions. A defect-free brown part signals readiness for sintering. For efficiency, scale via batch processing: nest multiple prototypes (<50mm cubes) in crucibles, reusing refractory powder to cut cycles and support rapid iteration. This approach compresses prototyping lead times by 50-80%, aligning with trends where 70% of organizations leverage 3D printing prototypes to shorten design loops, as per industry surveys. Proceed seamlessly to sintering for dense, functional metal parts.
Step 4: Sinter for Pure Metal Density
After completing the debinding process from Step 3, sintering transforms your brown Filamet™ prototype into a dense, functional pure metal part, achieving up to 98% theoretical density. This critical stage fuses metal powder particles through solid-state diffusion at high temperatures below the melting point, enabling 3D printing prototypes with properties rivaling traditional wrought alloys. Use a programmable kiln capable of reaching 1300-1450°C, such as TVF-compatible models, and pack brown parts in refractory crucibles with appropriate ballast like alumina for copper or bronze, and steel blend for stainless steels. Top with sintering carbon to maintain a reducing or inert atmosphere, preventing oxidation especially for reactive alloys.
Ramp the kiln gradually at rates like 111°C per hour to the target temperature, holding for 2-5 hours depending on alloy and part size; smaller prototypes under 50mm typically need shorter holds. TVF provides precise sintering charts for alloys including copper (1052°C/1925°F hold 1-5 hours), bronze (885°C/1625°F hold 5 hours), stainless steel 316L or 17-4PH (1232-1260°C/2250-2300°F hold 4-5 hours), and tungsten (2500°C+ in specialty furnaces). Access these detailed profiles in TVF’s comprehensive How to 3D Print Metal PDF and product pages. Cool slowly over 6 hours to room temperature under protection to minimize stresses.
Post-sintering, verify 95-98% density using the Archimedes method and measure linear shrinkage (10-20% typical: 12-18% for copper, 14-20% for stainless) with calipers or CMM against your scaled CAD model. Test functional properties like Rockwell hardness, tensile strength, and microstructure to ensure prototype performance; for instance, optimized stainless profiles match wrought specs at 95%+ density. To avoid distortion from thermal shock, incorporate intermediate holds, uniform wall thicknesses with fillets, and kiln thermocouples for calibration. This methodical approach supports rapid iteration for aerospace or jewelry prototypes, cutting lead times by 50-80% while reducing waste up to 90%.
Step 5: Finish for Production-Ready Prototypes
Tumble with Ceramic Media for 24-48 Hours to Smooth Surfaces
After sintering your Filamet™ prototype to achieve up to 98% metal density, begin finishing by tumbling the part in ceramic media for 24-48 hours. This vibratory process uses abrasive ceramic pieces, such as aluminum oxide triangles around 1/4-inch in size, to remove layer lines, deburr edges, and create a uniform smooth surface ideal for production-ready 3D printing prototypes. For intermediate users with entry-level tumblers, wet tumbling with a mild detergent enhances results while preventing contamination; expect 80% reduction in surface roughness, from typical post-sinter Ra values of 10-20 µm down to 2-5 µm. The Virtual Foundry recommends monitoring every 12 hours to avoid over-removal, especially on intricate geometries like aerospace brackets, preserving critical features. This step not only improves aesthetics but also enhances fatigue resistance by work-hardening the metal surface. In practice, jewelry prototypes emerge with a satin finish ready for further refinement.
Polish, Buff, or Sand for Jewelry/Art; Plate for Corrosion Resistance
Next, refine tumbled parts based on application: sand with progressive grits (220-2000) followed by buffing with rouge compounds for jewelry or art pieces using Filamet™ copper or bronze. This yields mirror-like shines suitable for high-end designs, as seen in artist commissions achieving commercial polish. For functional prototypes, apply electroplating or chemical plating with nickel or gold to boost corrosion resistance, vital for nuclear or marine exposure. Plating adds just 10-50 µm thickness, maintaining tolerances while sealing micro-porosity. The Virtual Foundry’s community shares plating protocols that extend part life by 5x in harsh tests.
Inspect Tolerances and Apply Coatings
Inspect post-process tolerances with digital calipers or CMM, targeting +/-0.5 mm for most Filamet™ sintered parts; tumbling typically removes 0.1-0.2 mm. For harsh environments like aerospace, coat with high-temperature epoxies or ceramic finishes such as Cerakote, enabling pressure testing up to 5000 PSI.
Document Before/After for Iteration Records
Capture photos, scans, and measurements pre- and post-finishing to track improvements, like 70% design loop shortening per industry surveys. This documentation fuels rapid iterations, aligning with The Virtual Foundry’s mission to democratize metal prototyping.
Case Studies: Prototypes in Aerospace and Nuclear
Aerospace Bracket Prototype
In the aerospace sector, The Virtual Foundry’s Filamet™ has enabled engineers to prototype a 90 mm bracket using 17-4 stainless steel filament on a standard enclosed FDM printer. After printing the green part, debinding in a kiln, and sintering with a 1.15x scale factor to account for shrinkage, the final component achieved tolerances of ±0.15 mm, suitable for functional fixtures. This approach slashed lead times by over 70%, from 21 days with traditional machining to just 3 days, allowing for rapid validation under load-bearing conditions. Iterations accelerated 5x faster, as design changes moved from CAD to printed prototypes in hours rather than weeks. Such efficiency supports complex geometries like conformal cooling channels, impossible with subtractive methods, and aligns with industry trends where 70% of organizations use 3D printing prototypes to shorten design loops.
Nuclear Shielding with Tungsten Filamet™
Tungsten Filamet™, loaded with over 90% tungsten powder, excels in nuclear applications for radiation shielding prototypes. Users print dense collimators and containers on FDM printers, followed by debinding and sintering to create parts that block over 99% of gamma rays at 122 keV. A nuclear lab case demonstrated on-demand production of custom shields, reducing inventory needs and enabling micron-level accuracy for intricate internal geometries. This method handles high-density requirements for X-ray and gamma attenuation, replacing toxic lead alternatives with non-hazardous, sinterable filaments. The result is functional prototypes tested in-field within days, supporting sectors pushing clean energy innovations.
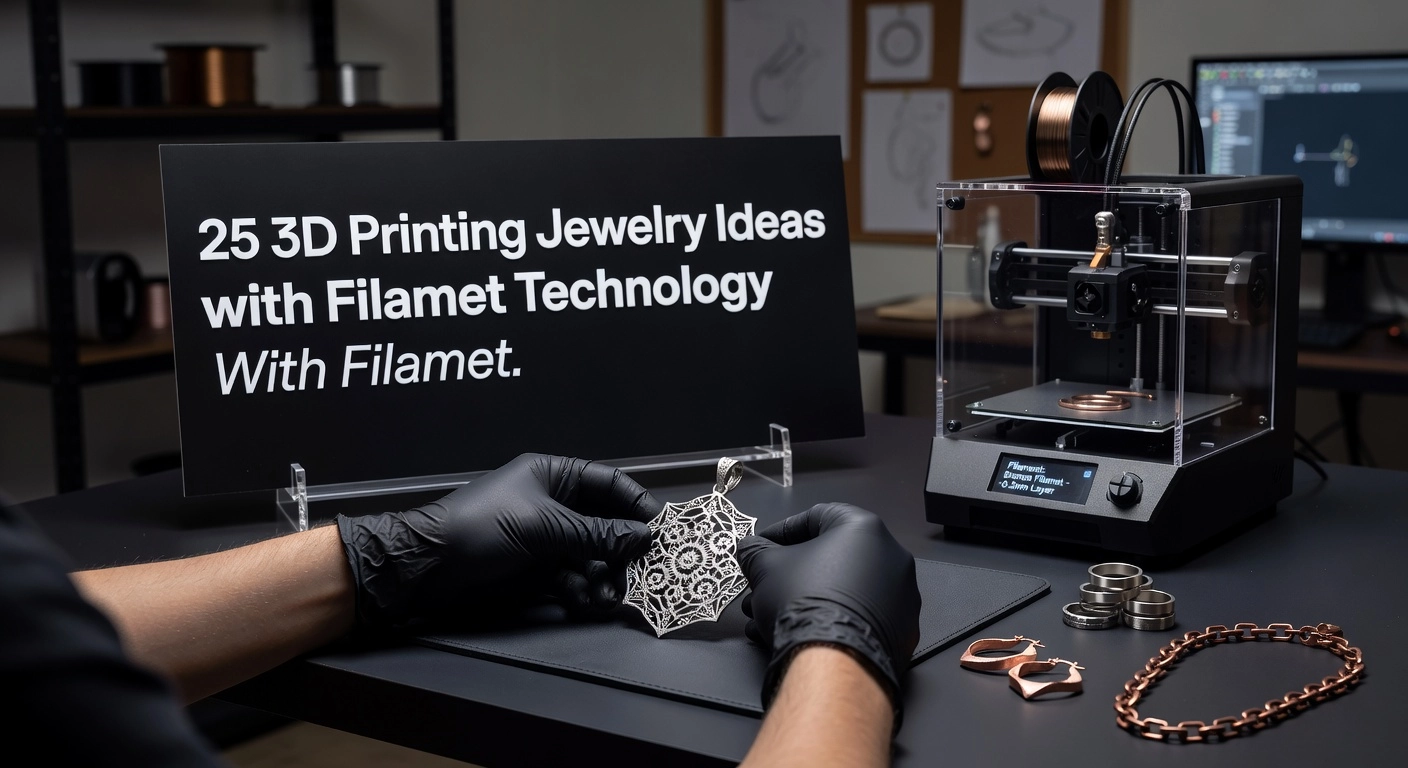
Jewelry Prototyping: Copper and Bronze Filamet™
For jewelry designers, copper and bronze Filamet™ facilitate rapid prototyping of pendants, rings, and filigree. Print green parts to validate fit and ergonomics, debind via solvent to avoid cracks, then sinter for jewelry-grade metal. Iterations incorporate client feedback swiftly, eliminating costly molds. Post-finishing with tumbling and patina yields warm-toned, polished pieces ready for market validation.
Glass Filamet™ for Artistic Sculptures
Artists leverage Glass Filamet™ for intricate sculptures with lattice structures on desktop FDM printers. After sintering, transparent borosilicate parts emerge with organic topologies unachievable via casting. This enables quick prototypes for wearables, fostering creative iteration.
Quantified ROI: 90% Waste Reduction
Across these cases, Filamet™ cuts material waste by 90% versus machining, shifting to low-volume production. Costs drop 70-90% (e.g., $240 to $72 per part), with lead times compressed 50-80%, delivering ROI through in-house control and scalability. (298 words)
Advanced Tips and Common Pitfalls
Compensating for Anisotropic Shrinkage in X/Y vs. Z Axes
Anisotropic shrinkage occurs because Filamet™ parts contract more in the X/Y plane (up to 20%) than the Z axis (10-15%) during sintering, due to layer-by-layer extrusion and binder burnout. To compensate, print calibration cubes measuring 20x20x20 mm, cool fully, and measure with digital calipers; apply slicer settings like XY scaling at 92.5% if a 100 mm feature shrinks to 92 mm. For precision, use Orca Slicer’s XY Hole Compensation (+0.15 mm) and separate Z scaling. This ensures tolerances under 0.2 mm post-sintering for 3D printing prototypes in aerospace brackets. Avoid pitfalls like uniform scaling only, which distorts assemblies; always validate per filament batch.
Batch Sinter for Uniformity; Use TVF Community Profiles
Batch sintering multiple Filamet™ brown parts symmetrically in your kiln promotes even heat distribution, achieving 96%+ density and reducing warping by 30%. Ramp slowly: for 316L stainless, hold at 1250°C for 2 hours under vacuum, expecting 18% uniform shrinkage. Leverage The Virtual Foundry community profiles on their site and Discord for tested recipes, like copper at 1052°C in argon, cutting trial errors by 50%. Test with density coupons via Archimedes method. Common pitfalls include rapid ramps causing cracks; use setters and fixtures for support.
Integrate AI Design Tools for 2026 Optimization (MeshMayhem Trends)
In 2026, AI tools like VibeCAD generate parametric models from text prompts, optimizing 3D printing prototypes for Filamet™ with built-in shrinkage and orientation. Prompt for “printable aerospace bracket, 17% overscale, lattice infill”; export to OpenSCAD for tweaks, slashing design time 90%. MeshMayhem trends emphasize watertight meshes for slicers. Pitfall: AI outputs need Blender retopology for constraints. This accelerates iterations for nuclear components.
Troubleshoot Warping with Slower Ramps, Better Bedding
Warping in green Filamet™ prints stems from bed adhesion failure; fix with slower first-layer speeds (20 mm/s, 100 mm/s² accel) and bed temps at 60°C. Enhance adhesion via IPA-cleaned PEI sheets, glue sticks, or brims; enclosures maintain 50°C chamber air. For PETG-like binders, skip fans. This yields flat prototypes 95% of the time. Avoid overheating, which causes delamination.
Scale to Production: Hybrid with CNC for Hybrids
Hybrid workflows print complex Filamet™ near-net shapes, then CNC finish for ±0.001” tolerances, reducing waste 70% versus full machining. Design 1-2 mm overbuild on features; fixture sintered parts securely. Ideal for conformal-cooled inserts, cutting lead times 50-80%. Pitfall: neglect thermal shifts during machining. This scales prototypes to low-volume production seamlessly.
Actionable Takeaways to Start Prototyping Today
Order Your Filamet™ Sample Kit and Test a Small Prototype
Begin by ordering The Virtual Foundry’s Filamet™ sample kit, which includes various metal filaments like 17-4 stainless steel or copper, ideal for intermediate users. This kit allows you to test on your enclosed FDM printer without large commitments. Print a small prototype, such as a 20 mm aerospace bracket or jewelry pendant, following the optimized design principles from earlier steps. After debinding and sintering, measure the 98% density achieved, confirming functionality for real-world testing. This hands-on trial typically takes 48-72 hours total, building confidence before scaling up.
Download Sintering Profiles and Engage with the Community
Access The Virtual Foundry’s free sintering profiles directly from their resources page to match your printer and alloy precisely. These profiles ensure optimal debinding at 400-600°C and sintering up to 1400°C, minimizing defects like warping. Join TVF community forums to share your green part results and learn from user posts on anisotropic shrinkage compensation. With thousands of active members, you’ll discover tweaks for complex geometries, accelerating your prototyping expertise.
Calculate Your Cost and Time Savings
Input your CAD design into TVF’s online estimator tool to project savings: expect 70% reductions in prototyping costs and 50-80% shorter lead times compared to traditional machining. For instance, a bracket prototype drops from weeks to days, with 90% less material waste. Industry data from Additive Manufacturing Research validates these figures, as 96% of companies now rely on 3D printing for prototypes per Jabil’s 2023 survey.
Experiment Across Sectors and Track Data
Apply Filamet™ to sectors like aerospace or nuclear by prototyping functional parts, such as turbine blades, and track iterations quantitatively. Log shrinkage data (20% X/Y, 15% Z) across 5-10 runs to refine designs, shortening design loops by 70% as per surveys. This data-driven approach supports rapid validation.
Seek Expert Support for Advanced Needs
Contact The Virtual Foundry experts for custom alloys or troubleshooting sintering issues, ensuring success in high-stakes applications. Their guidance has empowered hobbyists to professionals alike. Start today to democratize your metal 3D printing prototype workflow.
Conclusion
This tutorial has equipped you with essential skills to revolutionize prototyping. Key takeaways include optimizing CAD designs for Direct Metal Laser Sintering and Binder Jetting, selecting high-performance alloys like stainless steel, titanium, and aluminum, navigating service provider workflows with precision, and applying post-processing plus troubleshooting for cost savings and flawless results.
By mastering 3D printed metal parts, you eliminate weeks of delays, costly tooling, and material limits. Gain durable, functional prototypes that accelerate innovation and real-world testing.
Take action today: Choose a reputable metal 3D printing service, upload your optimized CAD file, and prototype faster than ever. Your engineering breakthroughs start now; seize the speed and strength of metal 3D printing to lead the future of making.