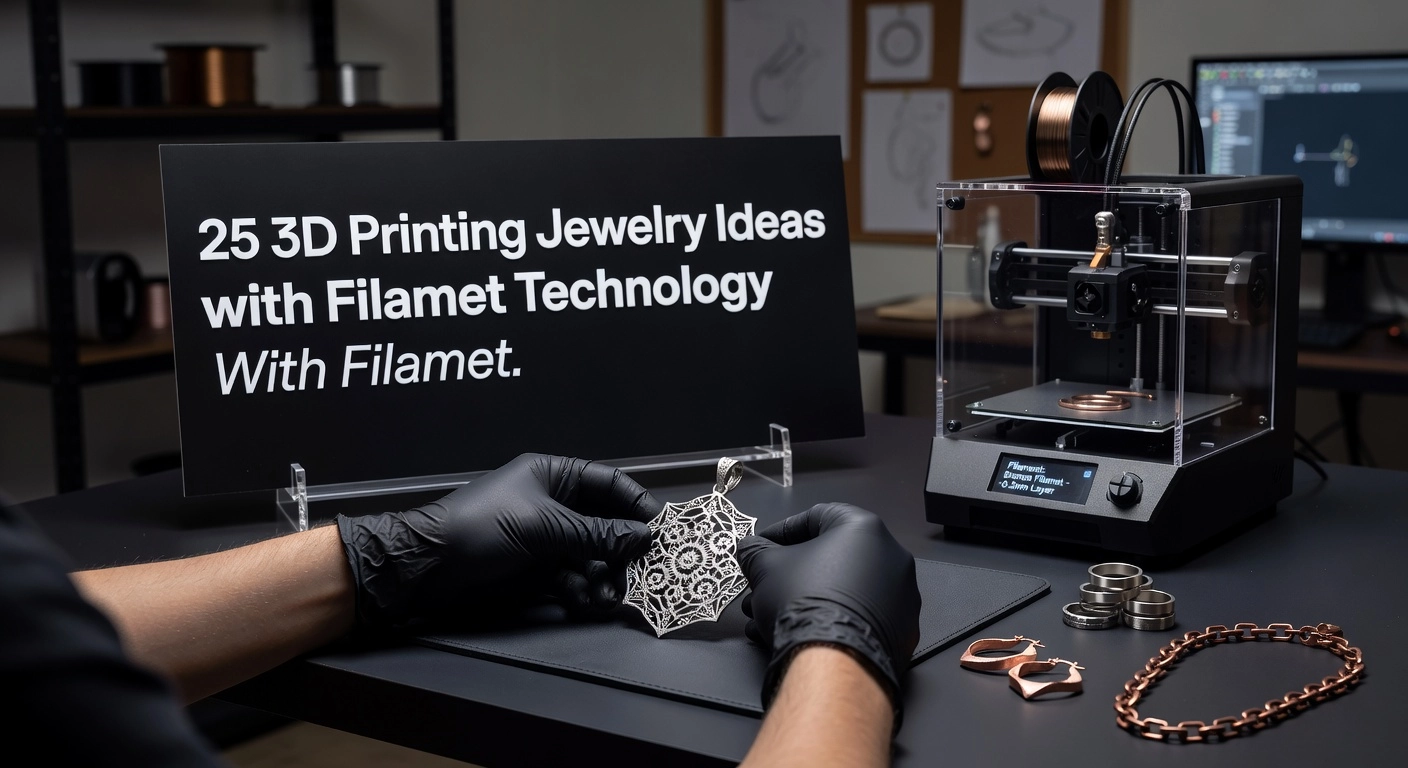
Imagine transforming your jewelry concepts from digital sketches into stunning, wearable realities with precision that handcrafting simply cannot match. As an intermediate 3D printing enthusiast, you already know the basics of modeling and slicing. Now, elevate your skills to professional levels through this ultimate 3D printing jewelry design tutorial.
In the pages ahead, you will master advanced techniques in CAD software like Fusion 360 and Blender, optimized specifically for intricate jewelry geometries. Learn to design lightweight yet durable rings, pendants, and earrings that minimize material waste and support costs. Discover proven strategies for selecting resins and metals compatible with high-resolution printers, along with calibration tips to achieve micron-level details.
We cover seamless workflows from initial concept to polished prototypes, including support structure mastery, curing processes, and electroplating for a luxurious finish. By following these step-by-step instructions, you will produce market-ready pieces that stand out in Etsy shops or custom commissions. Get ready to unlock the full potential of 3D printing jewelry design and command the artisan space you deserve.
Why 3D Printing is Revolutionizing Jewelry Design
The global 3D printed jewelry market is poised for explosive growth, projected to reach $4.89 billion in 2026, up from $4.17 billion in 2025, according to The Business Research Company’s comprehensive report. This surge reflects the technology’s ability to deliver intricate designs that traditional methods struggle to achieve, such as hollow structures and organic forms, while slashing production times from weeks to mere days. For intermediate designers, this means leveraging CAD software to model parametric rings or pendants with embedded gem settings, optimizing for 0.1-0.2mm layer resolutions to capture fine details. Material efficiency exceeds 90 percent, minimizing waste and enabling small-batch runs ideal for custom orders.
Looking ahead, the market will expand at a compound annual growth rate (CAGR) of 17.3 percent, hitting $9.26 billion by 2030, propelled by personalization and sustainability demands. Consumers now seek one-of-a-kind pieces, like AI-generated nameplate necklaces or memorial bracelets, produced on-demand without excess inventory. Sustainability shines through reduced scrap from additive processes versus subtractive carving, aligning with eco-conscious trends using recycled metal feedstocks. Designers can iterate prototypes rapidly, testing fits and aesthetics before final prints, which boosts client satisfaction and repeat business.
Key 2026 trends emphasize parametric customization via generative tools for unique, client-specific jewelry, and direct metal printing for complex filigree and lattices unattainable through casting. Imagine printing a bronze lattice pendant with internal voids; post-processing like tumbling yields a polished, wear-resistant piece in 48 hours. North America drives this with an 8.5 percent CAGR through 2033, fueled by desktop solutions accessible to SMEs and hobbyists. Affordable setups empower independent artists to compete in luxury markets, supported by e-commerce platforms for direct sales.
The Virtual Foundry’s Filamet™ filaments make this feasible, offering 75-90 percent metal-loaded options like copper or bronze for standard FFF printers. Print a green part, debind thermally, sinter at 900°C for 80-91 percent density, then patina for finish; a 14g copper ring costs just $14-15 including finishing. Scale models 13-20 percent larger to compensate shrinkage, and use supports sparingly for delicate filigree. This democratizes metal output, letting artists produce professional jewelry without industrial furnaces, as detailed in their jewelry case study.
Direct vs Indirect 3D Printing Methods
In 3D printing jewelry design, two primary approaches dominate: indirect and direct methods. Indirect methods rely on castable resins printed as patterns for lost-wax casting into precious metals like gold or silver. These resins capture exceptional detail, enabling intricate filigree, pavé settings, and features as fine as 0.5mm. The process involves designing in CAD software, printing on resin printers, attaching sprues, investing in gypsum, burning out the pattern cleanly with zero ash residue, pouring molten metal, and finishing through devesting, pickling, and polishing. While this yields high-fidelity results with smooth surfaces ideal for production batches, it demands access to a foundry for casting and extends lead times to 3-5 days per cycle, limiting it for one-off custom pieces.
Direct methods, powered by metal filaments like Filamet™ with 75-90% metal loading (such as copper or bronze), transform standard FFF printers into tools for producing sinterable green parts that become pure metal jewelry. This approach bypasses casting entirely, allowing desktop workflows for designers and hobbyists. Filamet™ filaments print on open-frame FDM printers equipped with hardened nozzles, using settings like 0.1-0.2mm layers, 100% infill, and vertical orientations to maintain uniform 1.2-2.0mm wall thicknesses and filleted edges.
The Filamet™ workflow is straightforward yet precise: First, print the green part with shrinkage compensation scaling models 13-20% larger. Next, debind thermally by nesting in alumina powder and ramping to 500°C in a crucible to remove binders without cracks. Then, sinter at around 900°C for copper in a programmable kiln with a non-reactive bed, achieving 80-91.6% density after 14-20% linear shrinkage. Finally, tumble, polish, or apply patina for a professional finish. See the TVF DIY 3D Print Jewelry Guide for step-by-step details.
Direct methods offer superior benefits, including 90% material efficiency versus traditional waste-heavy processes, enabling complex geometries like undercuts, internal voids, lattices, and integrated hinges impossible in casting. Entire production cycles complete in 48 hours on desktop setups, from print to wearable piece. For instance, the TVF DIY guide demonstrates a 14g copper ring costing just $14-15 total, factoring $1.40 in filament, $0.60 in energy, and $10-13 in finishing—proving accessible economics for bespoke jewelry and small batches. This efficiency empowers intermediate makers to iterate designs rapidly, fostering innovation in personalized rings, pendants, and bracelets.
Key Design Principles for Print-Ready Jewelry
Optimize Layer Resolution and Wall Thicknesses
For successful 3D printing jewelry design with metal filaments like Filamet™, target 0.1-0.2mm layer resolutions to capture intricate details such as prongs or filigree strands down to 0.6mm. Uniform wall thicknesses of 1.2-2.0mm are essential, ensuring the green part withstands debinding and sintering while achieving final densities of 80-91.6%. Thinner walls risk collapse during the 900°C sintering for copper Filamet™, whereas thicker ones promote even shrinkage. Test prototypes on standard FFF printers; for a 14g copper ring, this yields wear-resistant pieces at just $14-15 total cost including finishing. Actionable insight: Measure walls with calipers pre-print and adjust nozzle sizes (0.4mm ideal) for consistency.
Incorporate Fillets to Mitigate Shrinkage Cracking
Filaments like Filamet™ undergo 13-20% linear shrinkage during sintering, concentrating stress at sharp edges and causing cracks in rings or pendants. Apply 0.5-1.0mm fillets or chamfers at all corners, stress points, and junctions to distribute forces evenly. This simple CAD tweak reduces failure rates by smoothing transitions, vital for delicate lattices. In practice, a filleted filigree pendant sinters flawlessly, avoiding the micro-fractures seen in unfilleted designs. Use software like Fusion 360 to automate fillets globally; preview stress simulations if available.
Compensate for Shrinkage with Scaling and Slicer Previews
Scale models 13-20% larger in CAD or slicers to counter Filamet™’s predictable volumetric loss, achieving precise final dimensions. Copper variants shrink closer to 13%, while stainless hits 20%; always verify with slicer previews like those in PrusaSlicer or Simplify3D. For bracelets, uniform isotropic scaling prevents warping; anisotropic adjustments handle printer-specific traits. Print a calibration cube first: scale 15%, sinter, and iterate. This ensures gem settings fit post-process, turning prototypes into production-ready jewelry in 48 hours.
Strategic Support Generation for Visible Details
Minimize visible scars on filigree or lattices by using tree supports with 0.3-0.4mm fine tips, ideal for pendants and rings. Orient models at 45° angles to reduce support volume; auto-tree algorithms in slicers excel here. Add 2-3mm drain holes for hollows to ease debinding solvents. Post-print, supports snap off cleanly, preserving details before tumbling. Example: An intricate iced-out chain prints scar-free, ready for patina.
Leverage Parametric CAD for Customization
Parametric modeling in tools like Fusion 360 or Rhino with Grasshopper enables adjustable features such as scalable gem bezels, internal voids for weight reduction, or parametric bracelets with variable links. Drive parameters for ring sizes (4-13) or pavé patterns, updating entire models instantly. This democratizes bespoke jewelry; add undercuts impossible traditionally. TVF’s community shares Filamet™-optimized libraries, accelerating iterations for artists and designers. How to 3D Print Jewelry.
Step-by-Step CAD Modeling Workflow
Selecting Software and Sketching the Base Profile
For 3D printing jewelry design using Filamet™ filaments, select robust CAD software like Autodesk Fusion 360 or Rhino to ensure precision compatible with FFF printers. Fusion 360 offers parametric modeling ideal for iterative edits, while Rhino provides NURBS curves for smooth organic profiles essential in jewelry. Begin by sketching the base profile based on client specifications, such as a ring band’s inner diameter matching US size 7 (16.8mm) or a pendant’s outline. Constrain sketches with dimensions and symmetry to avoid distortions post-sintering. Extrude the profile 1.5-2.0mm for ring shanks to achieve uniform wall thicknesses that withstand debinding and sintering at 900°C for copper Filamet™. Alternatively, revolve the sketch around an axis for symmetrical pendants, generating solid geometry ready for detailing. This foundational step supports TVF’s direct metal workflow, enabling green parts that sinter to 80-91.6% density. For detailed software comparisons, see top jewelry design software list for 2026.
Adding Organic Details with Lattices, Filigree, and Boolean Unions
Elevate designs with intricate lattices and filigree patterns impossible via traditional casting, leveraging Filamet™’s ability to print 0.6-0.7mm bridges. In Fusion 360, apply the Pipe command along curve networks for wire-like filigree or generative tools for lightweight lattices reducing material use by 90%+. Rhino users can employ Grasshopper scripts for algorithmic twists, creating helical vines or geometric voids. Use Boolean unions to merge these elements with the base form, ensuring watertight solids to prevent slicer errors. For example, union twisted filigree overlays onto a ring band, maintaining minimum feature sizes for 0.1-0.2mm layer resolution. Add fillets (0.2-0.4mm radius) at stress points to enhance durability post-tumbling and polishing. These techniques align with TVF’s mission, producing complex art jewelry in 48 hours from print to finished piece.
Integrating Gem Settings with Precise Tolerances and Undercuts
Precision is paramount for gem settings in 3D printing jewelry design; model prongs at 0.6-1.0mm thick and bezels with 0.5-0.7mm walls, targeting 0.1mm overall tolerances. Use multi-axis modeling in Fusion 360 or Rhino plugins to create undercuts for secure stone retention without supports on visible surfaces. Design seats 0.05-0.1mm undersized for diamond girdles, with 30-40% prong coverage and 0.15-0.25mm pavé spacing. Orient settings at 30-45° angles to minimize support contacts during printing. Prototype in standard filament to test fit before Filamet™ production, compensating for 13-20% shrinkage by scaling seats accordingly. This ensures flawless integration, supporting bespoke pieces like halo engagement rings at $14-15 per part including finishing.
Parametrizing Dimensions for Scalability
Parametric design drives personalization in Filamet™ jewelry; define user inputs in Fusion 360’s parameters or Rhino variables for ring sizes (US 6-10), band widths (1.3-2.2mm), or halo diameters. Adjust once to auto-generate variants, slashing iteration time for small-batch production. For instance, link shank thickness to ring size for proportional strength post-sintering. This scalability fuels market trends, with the 3D printed jewelry sector at $4.89 billion in 2026 and 17.3% CAGR. TVF’s community shares parametric files for rapid customization in bronze or stainless steel.
Exporting STL and Verifying in the Slicer
Export as STL with 0.1mm chordal tolerance, 1-5° angle deviation, and 0.5mm max edge length for high-fidelity meshes (5-50MB). Scale models 13-20% larger to account for Filamet™ shrinkage. Import into your slicer to inspect overhangs, wall thicknesses (min 1.2mm), and generate tree supports for lattices. Simulate at 0.1mm layers, repairing non-watertight issues with Meshmixer. For CAD best practices, consult jewelry CAD design guide. This verification ensures print success, transitioning seamlessly to debinding and sintering for pure metal masterpieces.
Optimizing Models for Filamet Metal Filaments
Selecting the Right Filamet Alloy
For 3D printing jewelry design with Filamet metal filaments, begin by choosing the alloy that aligns with your aesthetic and functional goals. Bronze Filamet offers a warm golden-brown tone with excellent patina potential, making it ideal for pendants that develop rich, aged finishes through chemical treatments. Copper Filamet, loaded at 93% metal, provides vivid colors and dramatic patinas like blues and greens, perfect for artistic rings, though it requires sealing to resist oxidation. Stainless steel Filamet, such as 316L, delivers superior wear resistance and a cool gray sheen, suited for everyday rings or earrings that demand durability and high polish. Each alloy accepts soldering and finishing techniques similar to cast jewelry. Test small samples to match patina results with your design vision, ensuring pieces like filigree lattices achieve the desired luster post-sintering.
Optimizing Print Settings for Precision
Adjust slicer parameters to harness Filamet’s high metal content for flawless jewelry outputs. Set layer heights to 0.1-0.15mm to capture fine details in intricate designs, such as gem settings or engravings. Maintain print speeds at 20-40mm/s, roughly half of standard PLA rates, to ensure consistent extrusion and prevent lamination lines on visible surfaces. Use 100% infill with 3-4 perimeters for solid density, yielding 91-99% pure metal after sintering and avoiding internal voids that compromise strength. Employ hardened steel nozzles (0.4-0.8mm), hotend temperatures of 190-230°C, and bed adhesion aids like PEI sheets with glue sticks. Dry filament thoroughly beforehand; these settings, refined through TVF’s DIY 3D print jewelry guide, produce green parts ready for debinding in under an hour for small batches.
Accounting for Filamet Shrinkage with Scaling
Sintering induces 13-20% linear shrinkage, so scale models 15-20% larger in your slicer to achieve accurate final dimensions. TVF case studies recommend 1.18x for copper rings (14.8% shrink, 91.6% density) and 1.20x for bronze pendants, with slight Z-axis adjustments for gravity effects. Uniform wall thicknesses of 1.2-2.0mm and edge fillets minimize distortion. For a 14g copper ring, this scaling keeps costs at $14-15 per part, including finishing. Calibrate with test coupons under 50mm; scan results confirm tolerances of ±0.1-0.2mm. Build an alloy-specific shrinkage library for repeatable precision.
Orientation, Supports, and Bed Adhesion Strategies
Orient models vertically for rings to equalize shrinkage, tilting at 45° to reduce overhangs on aesthetic faces. Minimize supports to easy-remove custom structures, preserving filigree details. Add brims for small rings to enhance bed adhesion on PEI surfaces. These tactics, detailed in TVF’s metal 3D printing in jewelry case study, cut post-processing time by 30%.
Prototyping and Leveraging TVF Community Profiles
Print prototypes to verify fit, iterating 1-2 cycles in 48 hours. Download community-tuned slicer profiles for PrusaSlicer or Cura from TVF forums, optimizing for your printer. Refine based on real-world tests, like copper lattice survival through tumbling. This approach expands catalogs cost-effectively, as seen in bronze pendant productions dropping from $65 to $14 per unit. Access getting started with Filamet for profiles and refine your workflow seamlessly.
Printing, Debinding, Sintering, and Finishing
Printing Green Parts on Standard FFF Printers
Begin the 3D printing jewelry design process by printing green parts using standard FFF printers equipped with hardened steel nozzles, ideally 0.4mm for capturing fine details like filigree in rings or pendants. Filamet™ filaments, loaded with 75-90% metal powder such as bronze or copper, demand abrasion-resistant nozzles to prevent wear during extrusion at 190-210°C with a bed temperature of 45°C on PEI sheets coated with glue stick for adhesion. Print at reduced speeds, around 50% of typical PLA rates, with 0.1-0.2mm layer heights, high infill density, and concentric perimeters to ensure structural integrity post-sintering. An enclosed chamber maintains thermal consistency, minimizing warping in delicate structures with undercuts or lattices. Incorporate design compensations like 13-20% scaling for shrinkage and fillets at stress points. This step yields robust green parts ready for debinding, typically completing in hours on desktop setups like those from Creality or Prusa.
Debinding to Create Brown Parts
Debind green parts to remove polymer binders, transforming them into fragile brown parts using either solvent or thermal methods for safe, controlled extraction. For bronze Filamet™, solvent debinding with acetone baths dissolves over 40% of binder weight in 2 hours, followed by a thermal ramp; always use ventilation and PPE to handle fumes. Thermal debinding, preferred by The Virtual Foundry’s step-by-step guides, involves burying parts in alumina ballast within a crucible and ramping at 55.6°C per hour to 482°C for a 4-hour hold, achieving 82% binder removal without cracking. Verify progress by mass loss, targeting 10-15% reduction, and allow slow cooling. Larger parts over 50mm require extended holds. This prepares parts for sintering while preserving intricate jewelry geometries.
Sintering for Near-Full Density
Sinter brown parts in a tube furnace or programmable kiln to fuse metal particles into dense solids. For copper Filamet™, ramp at 111°C per hour to 900°C, holding for 4-6 hours to reach 95%+ theoretical density with fine grain structures. Bronze sinters at 885°C for 5 hours using magnesium silicate ballast and a carbon top layer for oxygen control, eliminating the need for inert gases. Repack parts with 25mm headspace and verify furnace accuracy within ±38°C. Slow cooling prevents distortion. Results include wear-resistant pieces with 80-91.6% final density, as detailed in FFF metal printing workflows.
Finishing and Quality Assurance
Finish sintered jewelry via tumbling with ceramic media to smooth layer lines, followed by sanding, rotary polishing for shine, or patina chemicals for bronze warmth and copper oxidation effects; seal with lacquer for durability. The Virtual Foundry’s guides enable 48-hour turnarounds from print to wearable piece, costing $14-15 per 14g copper ring including finishing. Perform quality checks: Archimedes test for porosity (target ≥95% density), caliper measurements against scaled CAD for dimensional accuracy, and hardness tests for wear resistance. Iterate designs based on prototypes, addressing issues like warping from rapid ramps. This workflow empowers intermediate makers to produce bespoke, sustainable jewelry efficiently.
How The Virtual Foundry Outpaces Big Players
The Virtual Foundry (TVF) leads in 3D printing jewelry design by offering Filamet™ filaments that work seamlessly on standard FFF printers, bypassing the high capital costs and complexity of proprietary metal systems that have hindered scalability for many users. These expensive setups often demand investments exceeding $100,000 in specialized hardware and furnaces, limiting them to large-scale operations and leaving small-batch creators underserved. In contrast, TVF’s approach uses everyday printers like Prusa or Creality models with hardened nozzles, enabling costs as low as $14-15 per finished copper ring, including filament, energy, and polishing. This accessibility spans hobbyists crafting custom pendants to manufacturers producing parametric bracelets, with predictable 13-20% shrinkage compensated via simple CAD scaling (e.g., 1.18x XY, 1.22x Z for copper).
TVF’s success stems from diverse jewelry alloys like Bronze Filamet™ for warm, polishable finishes and Copper for vibrant patinas, paired with straightforward debind-sinter workflows. Print at 190-210°C with 100% infill, debind in a powder bed at 500°C, then sinter at 900°C for 80-91.6% density in a standard kiln. A full cycle yields wear-resistant filigree rings in 48 hours, far outperforming traditional casting in speed and waste reduction. Case studies show 30-35% faster lead times and 18% less scrap for bespoke pieces.
By prioritizing affordability and ease, TVF fills gaps in metal democratization, sustaining growth amid industry challenges while empowering over 3,000 users from artists to aerospace. For small-batch jewelry, TVF excels with tool-less production and high-mix customization, ideal for the $4.89 billion market growing at 17.3% CAGR to 2030. Check TVF’s DIY jewelry guide for profiles and vindication article on open printing.
Robust community support, including free sintering schedules, blogs, and Reddit threads, drives adoption in art and bespoke markets, fostering rapid iterations for personalized lattices and gem settings.
Real-World Case Studies and Examples
TVF Filamet™ Copper Ring
Consider the TVF Filamet™ copper ring, a prime example in 3D printing jewelry design. This piece uses just $1.40 in filament for a 14-gram green part, printed on a standard FFF printer. After debinding and sintering at around 900°C, it achieves 91% density with 15-20% predictable shrinkage. Post-sinter patina application creates oxidized greens and blues, sealed with lacquer for hip-hop style boldness and wear resistance. Designers iterate sizing rapidly, testing ergonomics in hours rather than days.
Filigree Pendant: Lattices Beyond Casting
The filigree pendant case study highlights direct printing advantages. TVF Filamet™ copper enables 0.6mm lattices and webs, optimized with 1.18-1.22 scaling and 0.1mm layers. These intricate structures, impossible via casting due to core complexities and stresses, sinter to high detail retention. Finishing involves tumbling, polishing, and patina for luster. Total process: 48 hours, two iterations.
Parametric Bracelet in Stainless Steel
Parametric bracelets with adjustable links showcase durability. Printed from stainless Filamet™, they feature seamless hinges and custom fits, sintered for corrosion resistance. Post-processing yields crisp edges via tumbling and buffing, perfect for daily wear.
Explore full visuals in the TVF Metal 3D Printing in Jewelry Case Study. ROI is compelling: rapid iteration slashes design time by 80%, aligning with 2026 personalization trends for bespoke pieces at $14-15 per unit.
Actionable Takeaways to Start Designing
Download TVF Filamet Slicer Profiles and Shrinkage Calculator
Start your 3D printing jewelry design journey by downloading The Virtual Foundry’s Filamet slicer profiles and shrinkage calculator from their resources page. These tools compensate for 13-20% linear shrinkage during sintering, ensuring precise final dimensions for rings and pendants. Load the profiles into your slicer software for optimal settings like 0.1-0.2mm layers and 1.2-2.0mm walls. The calculator scales models automatically, saving hours of trial and error.
Prototype a Simple Ring in a Weekend
Design a basic parametric ring in Fusion 360, print the green part with Copper Filamet using a 0.4mm hardened nozzle, then debind and sinter at 900°C. Finish by tumbling and polishing for a $14-15 piece ready in 48 hours. This workflow yields 80-91.6% dense metal with wear-resistant results.
Leverage the TVF Community and Experiment with Patinas
Join The Virtual Foundry’s community for free templates, troubleshooting forums, and custom alloy advice tailored to jewelry. Experiment with patinas on copper or bronze Filamet to create unique 2026 trend pieces, aligning with Jewelry Design Trends 2026 in complex, sustainable forms.
Scale to Production Efficiently
Batch debind and sinter runs to produce multiple pieces, cutting energy costs and enabling small-batch customization for market growth projected at $4.89 billion in 2026.
Conclusion
In this ultimate 3D printing jewelry design tutorial, you have mastered advanced CAD techniques in Fusion 360 and Blender for intricate geometries. You learned to craft lightweight, durable rings, pendants, and earrings that minimize material waste. You gained expertise in selecting resins and metals, along with calibration for micron-level details. Finally, you explored seamless workflows from concept to polished prototypes via support mastery, curing, and electroplating.
These skills elevate your hobby to professional artistry, turning digital dreams into wearable treasures with unmatched precision. Now, fire up your printer, select your first design project, and apply these steps today. Your signature jewelry collection starts here. Create boldly, and share your stunning results in the comments below!